Record a test
Recording a test is the fastest way to create automation in AIVA. Open the application you want to test, perform the actions manually, and AIVA turns those actions into reusable test steps. This guide explains how recording works, what gets captured, and the limitations you should know about.
How recording works
When you record a test, you drive a real browser that runs on AIVA's side. What you see in your own browser is a live video stream of that browser: it looks like a web page, but it isn't one. When you click, type or scroll over the stream, AIVA captures that input and forwards it to the recorded browser.
Keep this picture in mind while you record. It explains why your own browser's context menu stays hidden when you right-click, why your keystrokes land in the recorded browser, and why some gestures, such as dropping a file, can't reach the page at all.
Step 1: Enter the starting URL
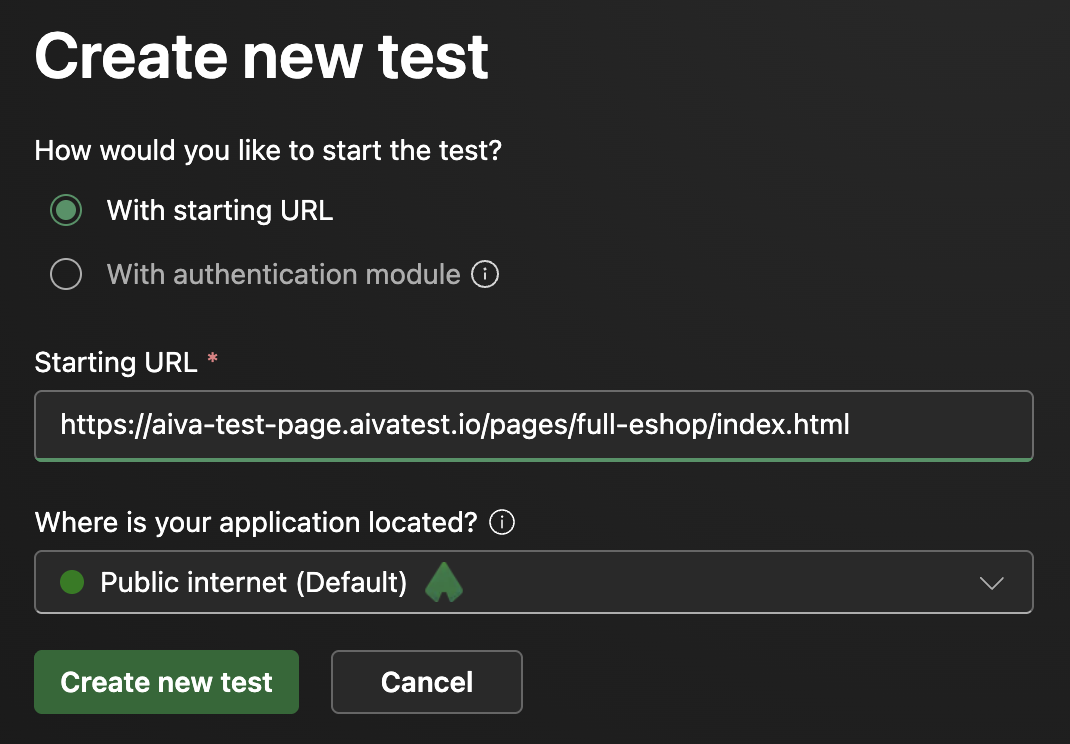
If the application you want to test isn't publicly reachable, for example it runs on localhost, private networks or behind your corporate network, AIVA needs a gateway to reach it. To set one up, see Access local applications. If you don't have any gateway set up, AIVA doesn't ask you to select one. It recommends setting one up only when it can't reach the URL you entered.
To start recording a test:
- Enter the URL of the application you want to test.
- If the application isn't publicly reachable, select the gateway.
- Click Create new test button.
Step 2: Record your actions
You entered the test recording mode. The browser stream takes up most of the page, with the toolbar above it. The steps you record appear in the Recorded steps list on the left, and Save recording is in the top right corner.
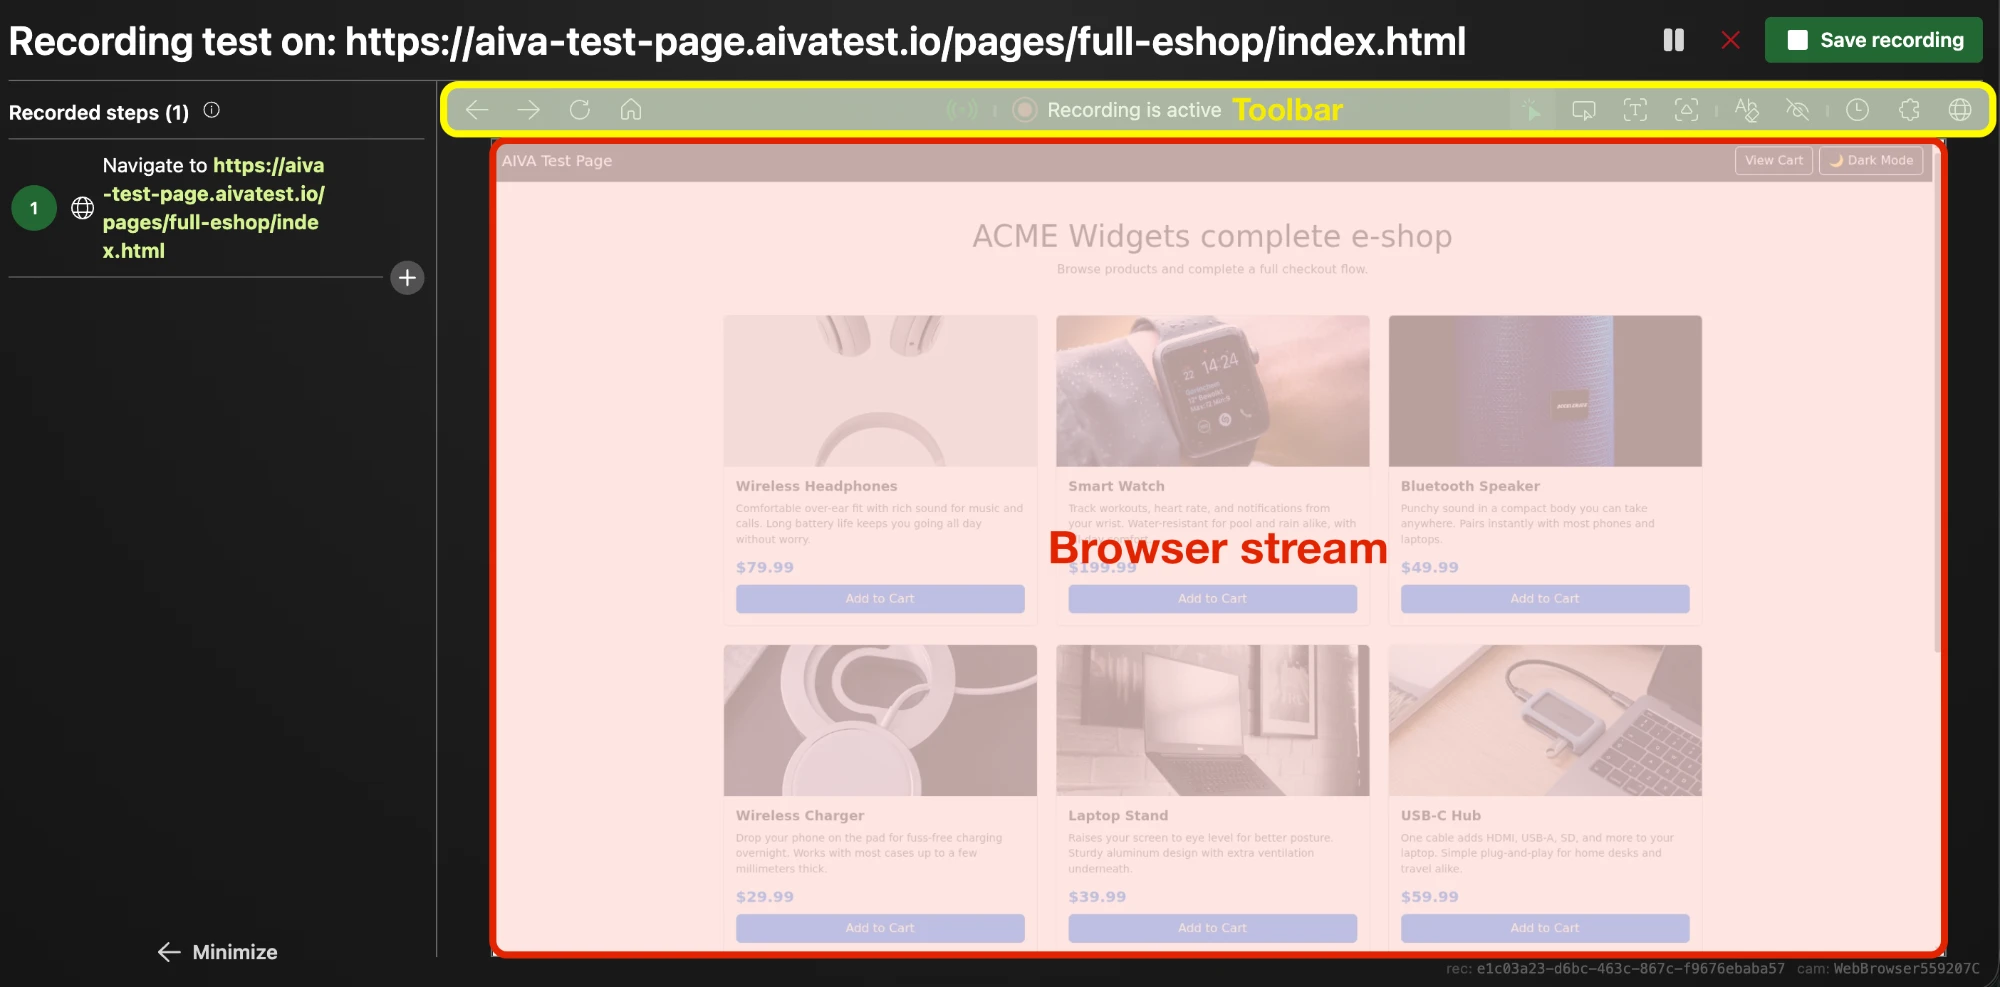
Now let's go throuhg everything you can and cannot do while recording: which tools are available in the toolbar, how clicking and typing on the stream turn into steps, and how AIVA handles scrolling.
Browser tools
The left side of the toolbar has the same controls you know from your own browser. They act on the recorded browser, not on yours, and each one records a step:
- Back goes to the previous page.
- Forward goes to the next page.
- Refresh reloads the current page.
- Home goes back to the starting URL of the test and records a Navigate step with that URL.
Recording tools

The first group of tools on the right side of the toolbar decides what a click on the stream does. These are the only four tools that change it:
| Tool | Shortcut | What a click on the stream does |
|---|---|---|
| Click | Ctrl+1 | Clicks in the recorded browser and records the click as a step. |
| Move mouse to position | Ctrl+2 | Moves the recorded browser's mouse pointer to the position you click. Useful for displaying the tooltips. |
| Assert text | Ctrl+3 | Verifies the text you click, or the text inside a rectangle you draw. |
| Assert image | Ctrl+4 | Verifies the image you click, or the image inside a rectangle you draw. |
The tool shortcuts use Ctrl on a Mac too. Cmd+1..4 isn't a recording shortcut. Your browser usually uses it to switch tabs, which takes you away from the recording.
An assert is a step that checks the page shows what you expect, for example a confirmation message after you submit a form. For more on the two assert tools, see Use asserts to verify the expected result.
The rest of the right side of the toolbar adds other kinds of steps:
- Clear text clears the text in the currently active field.
- Hide text hides all text you type while this tool is active. Use it for sensitive information.
- Delay makes the test wait for a fixed time. To wait for the page to load or reach some state, use an assert with patience instead. See Use asserts also for waiting.
- Module (the puzzle-piece icon) inserts a module, a reusable set of steps such as a login.
- Navigate adds a step that opens a URL in the recorded browser.
Click
With the Click tool selected, click on the stream the way you would on any page. A single click records a click step. A double-click records one step, not two.
AIVA saves the gesture on the step. To change it later, open the step's options and pick a different value in the Gesture field: Click, Double-click or Right-click.
Where you click matters for how reliably the step replays. See Design reliable tests for how to pick stable targets.
Right-click
Right-clicking is recorded while the Click tool is selected. Here's what happens when you right-click on the stream:
- AIVA catches the right-click and suppresses your own browser's context menu.
- AIVA forwards the right-click to the recorded browser.
- Any context menu you see after that is the tested application's own. It's drawn inside the stream. Pick an item with an ordinary left click, and that click becomes a step too.
- AIVA records the right-click as a step with the Right-click gesture, and replays it the same way.
AIVA suppresses your browser's menu only while the Click tool is selected. With Move mouse to position, Assert text or Assert image selected, a right-click on the stream opens your own browser's menu and AIVA records nothing.
Type
Your keystrokes go to the recorded browser, not to your own page, the same way your clicks do. You can also paste whole text by Ctrl/Cmd+V and AIVA will type it into the recorded browser.
Besides regular typing, AIVA records and replays these keys on both Windows and Mac:
BackspaceandDeleteTabandShift+TabEnterEsc- Arrow keys
HomeandEndPage UpandPage Down
It also records and replays these shortcuts:
| Action | Windows | Mac |
|---|---|---|
| Select all | Ctrl+A | Cmd+A |
| Undo | Ctrl+Z | Cmd+Z |
| Redo | Ctrl+Y | Cmd+Shift+Z |
| Delete word backward | Ctrl+Backspace | Option+Backspace |
| Delete word forward | Ctrl+Delete | Option+Delete |
| Paste | Ctrl+V | Cmd+V |
| Jump by word | Ctrl+Left / Right | Option+Left / Right |
| Start or end of line | Home / End | Cmd+Left / Right |
| Start or end of document | Ctrl+Home / End | Cmd+Up / Down |
Some operating-system and browser shortcuts may not be recorded. If a shortcut doesn't work as expected, use direct typing or another supported interaction.
If you type values that change between environments or runs, such as URLs or logins, switch the recorded typed text to a variable instead of fixed text. See Parametrize tests.
Scroll
When you scroll the mouse wheel over the stream, the recorded browser scrolls at the exact position of your mouse pointer. That way, AIVA can tell whether you're scrolling the whole page or a smaller UI element.
AIVA doesn't record the scroll as a step. Instead, it remembers which elements needed scrolling to reach and where on the screen the scroll happened. When the test runs, AIVA scrolls to those elements automatically, so you don't have to add anything to the test yourself.
In small UI elements, such as combo boxes, drop-down menus or small modals, scrolling may not be reliable. If possible, scroll until the target item is fully visible before selecting it. This generally produces more reliable recordings. See Known limitations.
Stream limitations
Because the stream is a video, some gestures can't reach the recorded browser. If you drag a file from your computer onto the stream, it lands on pixels, not in the browser.
To upload a file, click the button or field in the stream that opens the file chooser in the tested application. AIVA hides the system file chooser and opens its own modal instead. In the modal, drop a file or browse to choose one from your computer, then click Upload. If the page's file field accepts one file, the modal is called Upload a file and takes one file. If the field accepts several, it's called Upload files and you can choose several at once. The modal shows the size limit per file and how much of your workspace's file storage is left. If this recording already has uploaded files, you can also reuse one of them instead of uploading it again. AIVA records the upload as a step. You can later open the step to download the file or replace it with a new one.
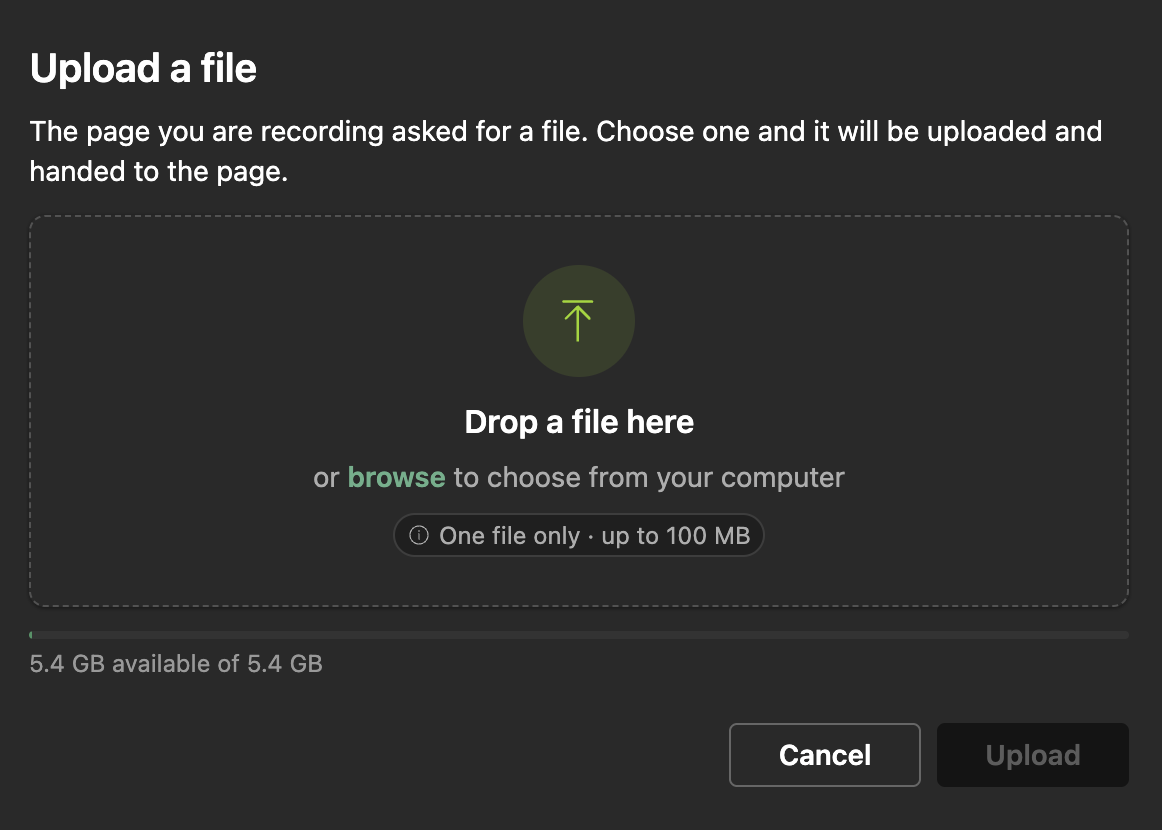
Anyone you invite to your workspace can access the files you upload, the same way they can access your tests and test results. Avoid using files with sensitive information.
Drag-and-drop and zoom run into the same problem. Test scenarios that rely on them are listed in Known limitations. If one of them blocks you, let us know.
Step 3: Finish and review
When you've recorded the last interaction, save the recording. When you save it, you enter a name for the test and can add labels to it. Labels group tests, so you can run a whole group together in a batch, or keep your tests organized. See Organize tests using labels.
After saving, review the step list.
You can edit the test steps at any time. Change a step's details, for example its gesture, or add new steps in between the existing ones, for example an assert. We suggest ending each test with one or more assert steps, so AIVA verifies the result and not only that the steps can run.
Once your test is saved, look for steps you'll need in other tests too, such as logging in, setting up test data or getting to a deep page. In edit mode, select that range of steps and extract it into a module. You can then insert the module into any other test instead of recording the same steps again. When those steps change, you update the module once and every test that uses it picks up the change. See Make your life easier with modules.
When your application's UI changes, you don't have to start over. Heal individual steps (click the element's new location in the failed step's screenshot, and AIVA updates the step), or re-record from a step when a whole section of the flow is new. See Use healing or re-recording to fix broken steps. If your test works with tables, see Reliable table interactions.
To run the test together with other tests, see Run test batches.